Clean Your Refrigerator Coils: The 15-Minute Task That Saves Hundreds
If you want to do one thing to extend your refrigerator’s life and cut your electricity bill, this is it: clean the condenser coils.
It takes about 15 minutes, costs nothing, and most Southern California homeowners have never done it — even after owning their fridge for a decade.
What Are Condenser Coils and Why Do They Matter?
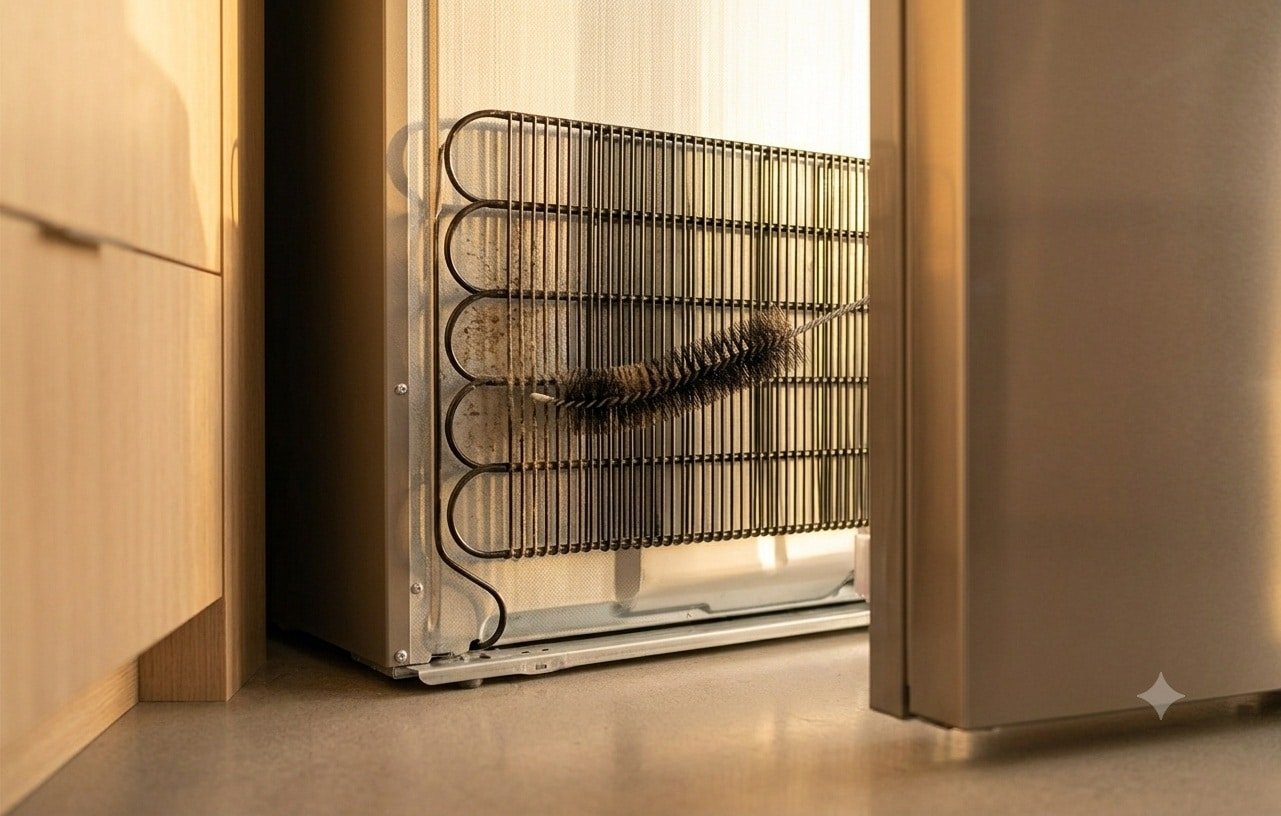
Your refrigerator works by circulating refrigerant through a closed loop. The condenser coils — located at the back of the fridge or underneath behind a grille — are where the refrigerant releases heat to the surrounding air. This heat exchange is the core of the cooling cycle.
When coils get coated with dust, pet hair, and debris, they can’t release heat efficiently. The compressor runs longer and hotter to compensate — using more electricity, wearing out faster, and struggling to keep your food properly cooled.
In Southern California, where SoCalEdison rates rank among the highest in the nation and summer ambient temperatures already challenge your fridge, dirty coils are a double problem.
How Often Should You Clean Refrigerator Coils?
Every 12 months for most households. Every 6 months if you have pets. Animal fur is remarkably efficient at clogging coil fins — and most OC households have at least one dog or cat.
How to Clean Your Refrigerator Condenser Coils
What you’ll need: – Vacuum cleaner with a narrow attachment or crevice tool – Refrigerator coil cleaning brush (~$8 at Home Depot) – Flashlight
Step-by-Step:
Step 1: Pull the fridge away from the wall and unplug it.
Step 2: Find the coils. On older models they’re on the back — a grid of black metal tubing. On most modern fridges, they’re at the bottom front behind a snap-off grille panel.
Step 3: Use the coil brush to gently loosen accumulated debris between the fins. Work carefully — fins bend easily.
Step 4: Vacuum thoroughly with the narrow attachment. Get into the drip pan area too — it collects debris and can grow mold.
Step 5: Reinstall the grille, push the fridge back (leave 1–2 inches of clearance from the wall), and plug it back in.
Signs Your Coils Are Overdue for Cleaning
- Refrigerator runs constantly without cycling off
- Fridge interior warmer than it should be
- Unexpected spike in your SoCalEdison bill
- Compressor hum sounds louder than usual
- More than a year since you last cleaned them
The Real Cost of Neglecting Coils
A compressor running 20% harder due to dirty coils adds $30–$80 in unnecessary electricity costs per year. Over the life of a refrigerator, dirty coils are one of the primary reasons compressors fail prematurely — and compressor replacement runs $400–$600.
Fifteen minutes with a vacuum brush once a year looks very smart by comparison.
Frequently Asked Questions
My fridge still isn’t cooling well after I cleaned the coils — what now? Coil cleaning resolves many efficiency issues, but if cooling is still inadequate, the problem may be a failing thermostat, defrost system issue, or compressor wear. Call OCG Appliances for a diagnosis.
Can I use compressed air to clean the coils? It works but blows debris into the kitchen. A coil brush and vacuum control the debris much better.
What’s the normal operating temperature for a fridge and freezer? Refrigerator: 35–38°F. Freezer: 0°F. Use a standalone appliance thermometer ($8–$10) to verify — your fridge’s built-in display isn’t always accurate.
Refrigerator not performing well in Orange County? OCG Appliances offers professional maintenance checks and repair. Visit ocgappliances.com.